How to create and manage client subaccounts
Create a subaccount for a client, which generates a Stripe payment link and sends an activation email, then manage it from your table.
Last updated 4 days ago
The Subaccounts section is where you create and manage your clients' accounts. When you create a subaccount, Lety automatically generates a Stripe payment link and sends an activation email to your client so they can set up their own account.
Where to find it: in the left sidebar, under Agency, click Subaccounts.
Before you start: connect Stripe and create at least one plan first. You need both to assign a plan to a client — without them, you can only create a subaccount with "Choose a plan later".
What you'll see on the Subaccounts page
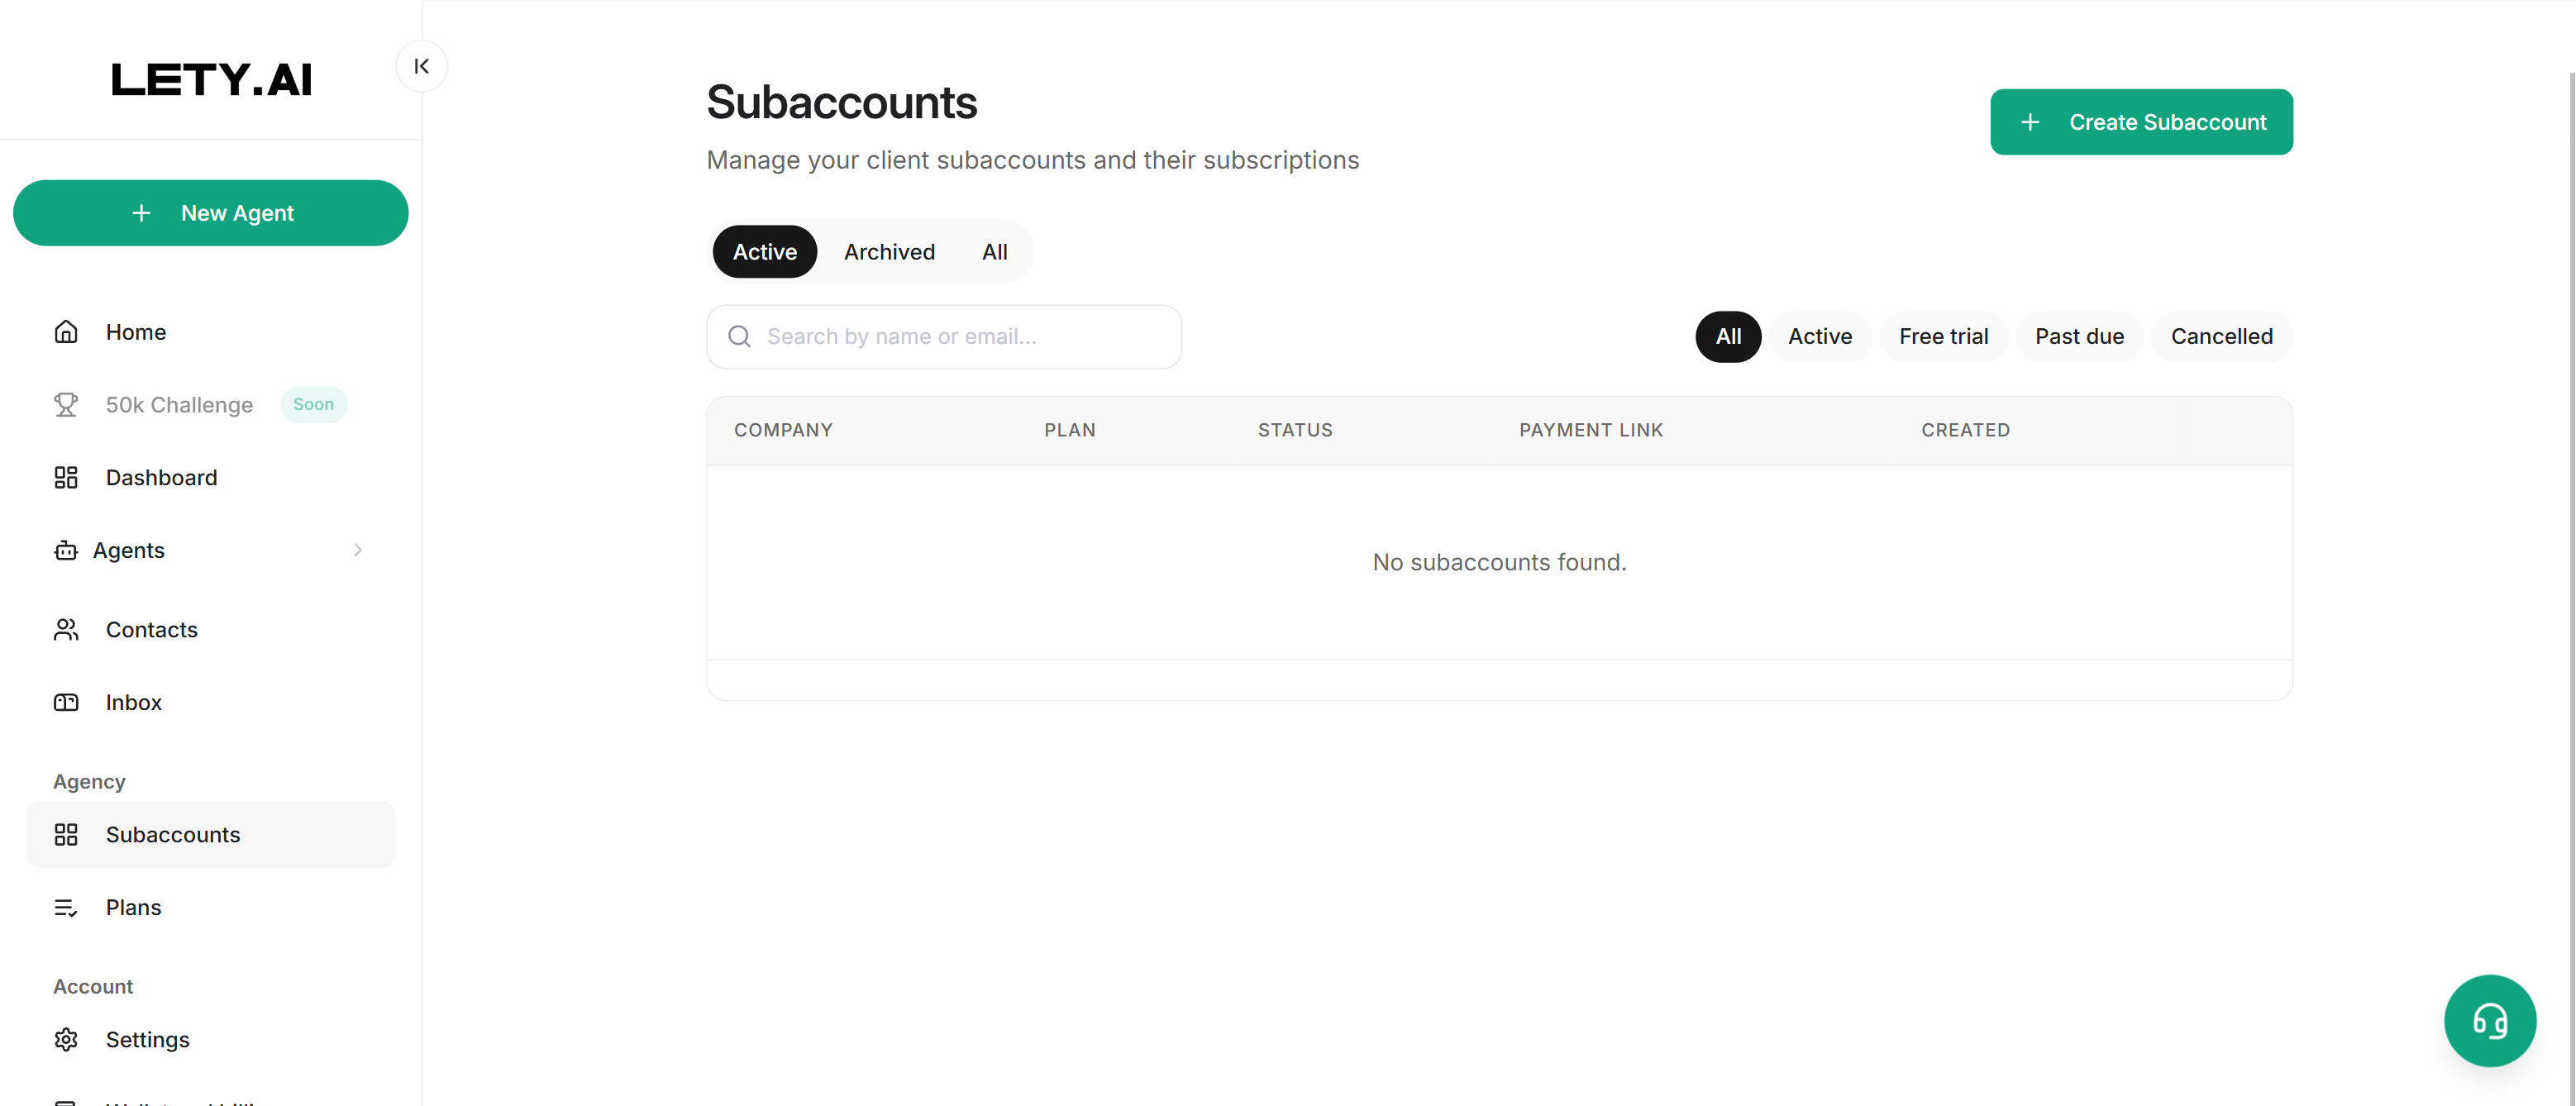
Search bar — find a subaccount by name or email.
Status filter tabs — switch between All, Active, Free trial, Past due, and Cancelled.
Subaccounts table — one row per client, with the columns Company (name and email), Plan, Status, Payment link, and Created.
+ Create Subaccount — the green button in the top-right corner that opens the create form.
Step by step: create a subaccount
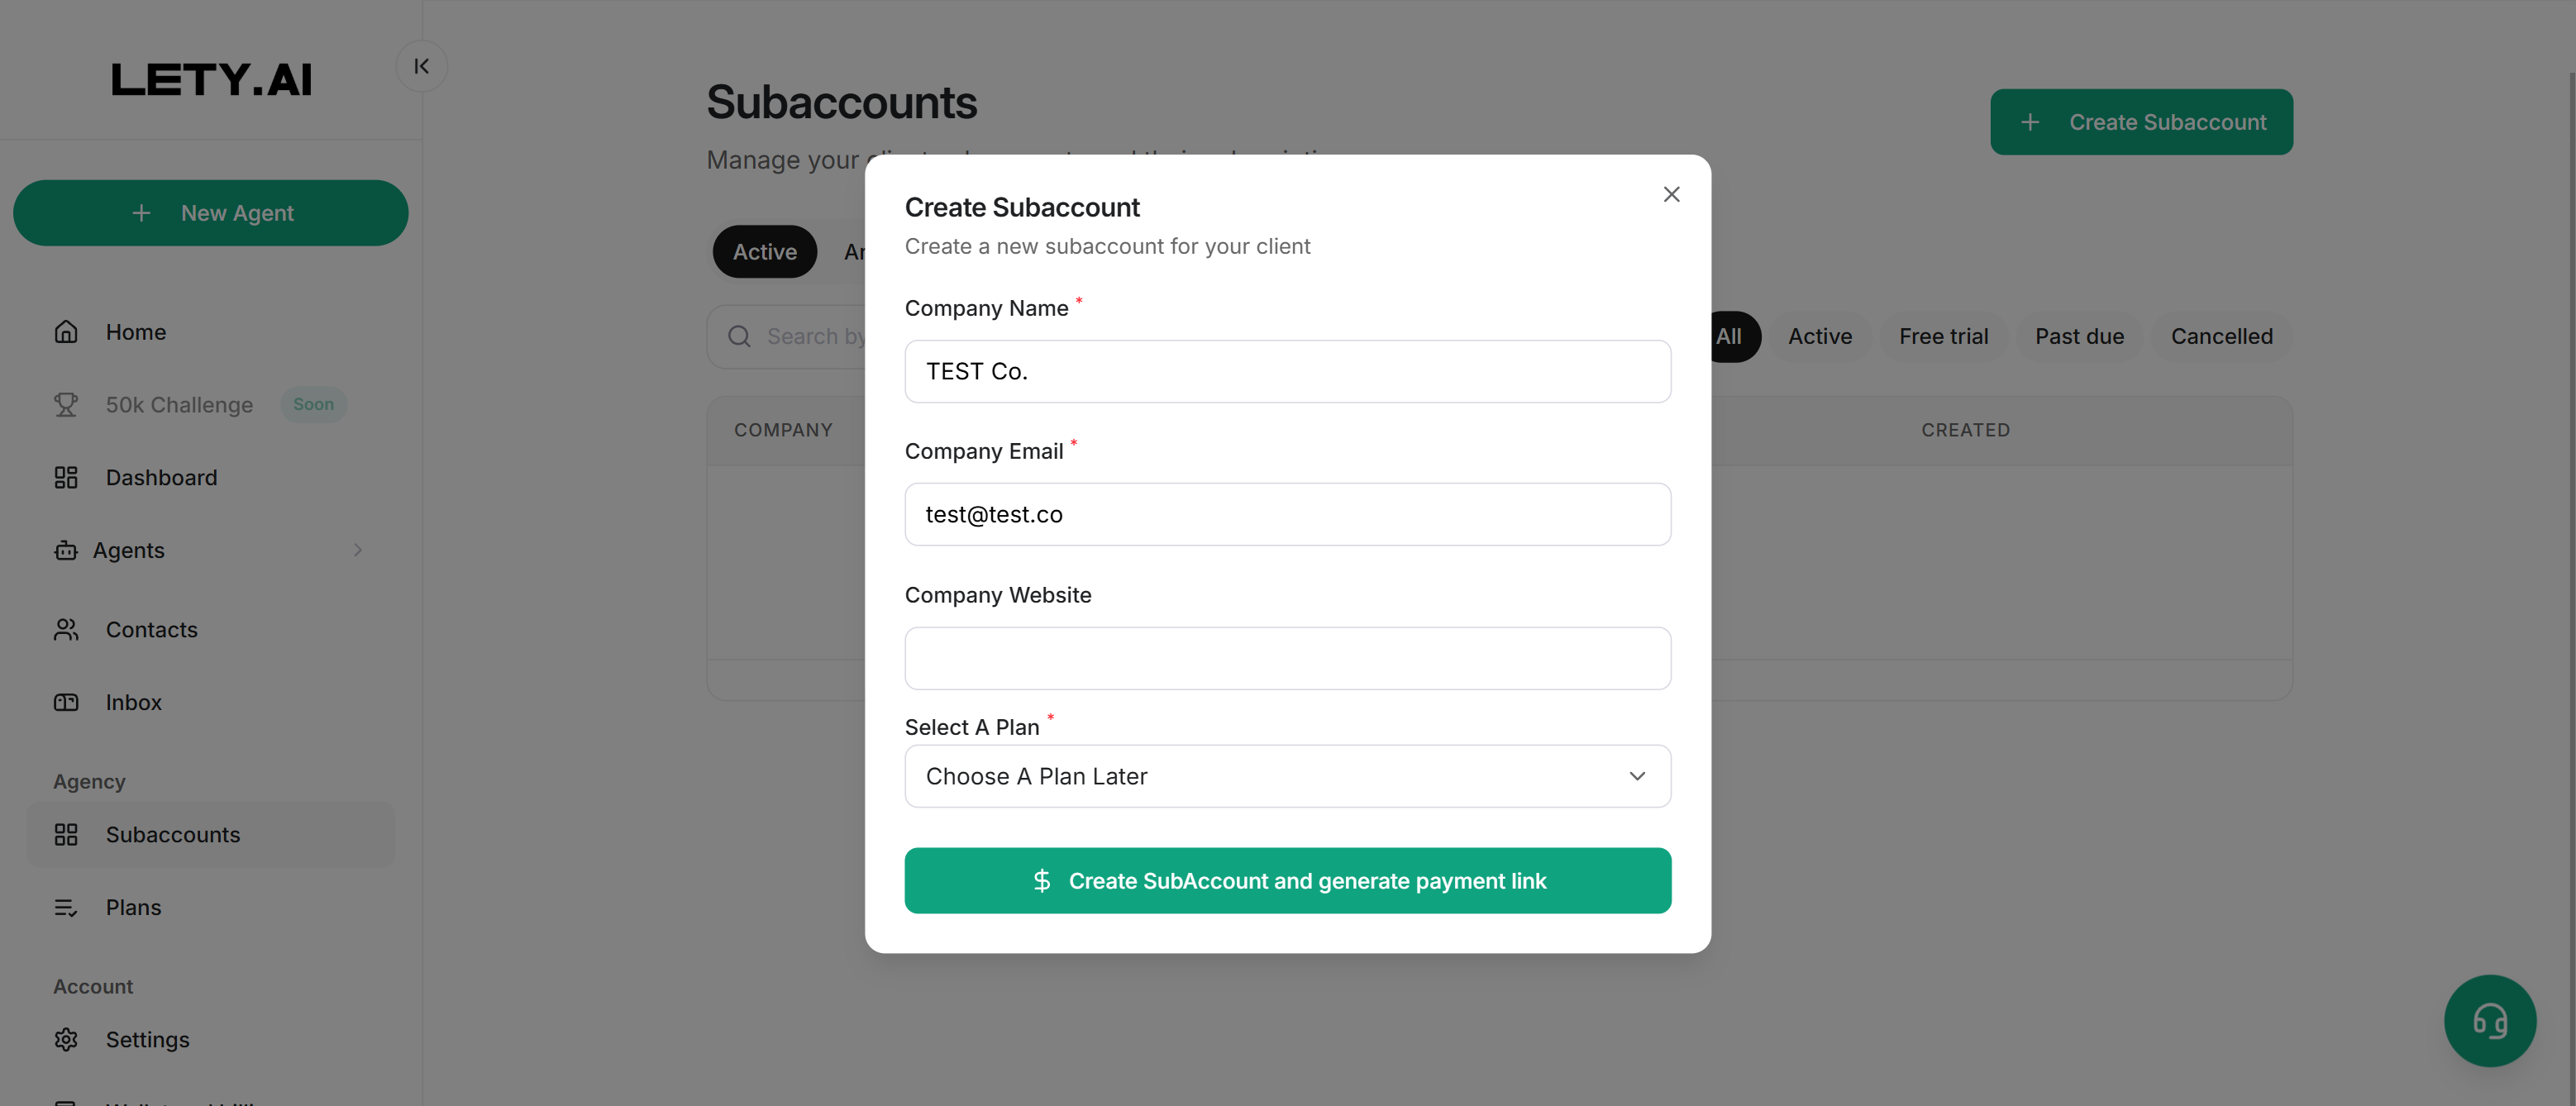
Click + Create Subaccount in the top-right corner. A form opens titled "Create a new subaccount for your client".
Enter the company name (required) — your client's business name. It becomes the primary identifier in your subaccounts table.
Enter the company email (required) — the address where your client receives the activation email, so use one they can access.
Enter the company website (optional).
Choose a plan from the dropdown. It lists every plan you've created, plus a "Choose a plan later" option. When you pick one, a preview card shows its name, description, and price.
Click Create subaccount and generate payment link.
Lety then does two things automatically: it generates a Stripe payment link (copied to your clipboard so you can send it to your client) and emails your client an activation link to set their password.
What happens after you create a subaccount
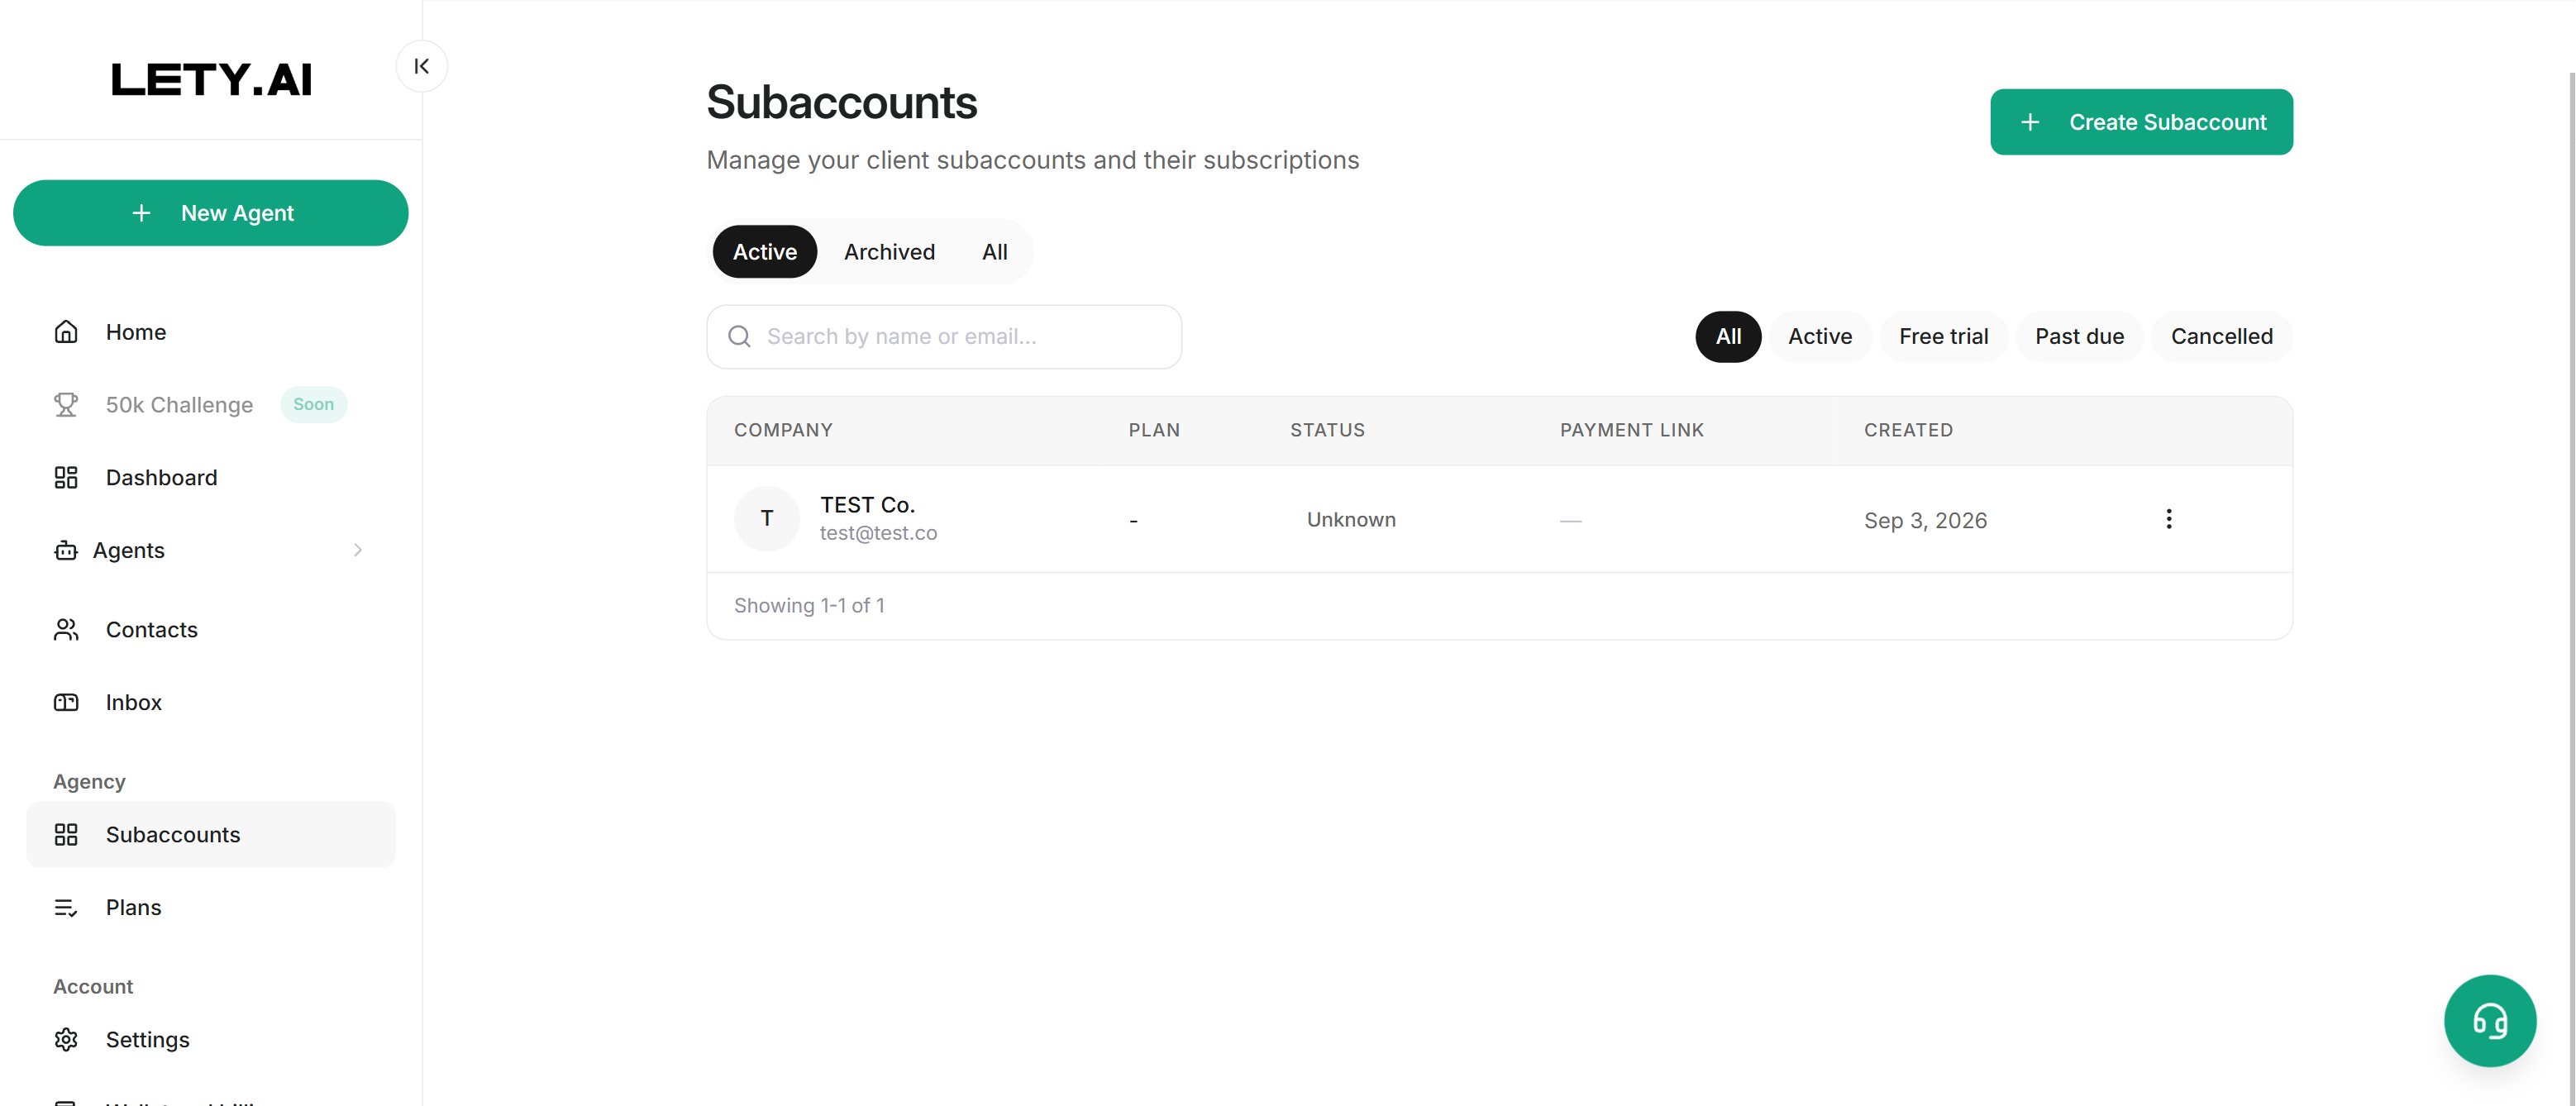
The subaccount appears in your table with the status Unknown and no plan until the client activates and pays.
Your client receives an activation email to set their password and activate the account.
You receive a confirmation email letting you know the client was added.
Once the client activates and completes payment through Stripe, the status changes to Active and the plan is assigned.
Manage an existing subaccount
In the subaccounts table, click the three-dot menu at the end of a client's row. It opens these options:
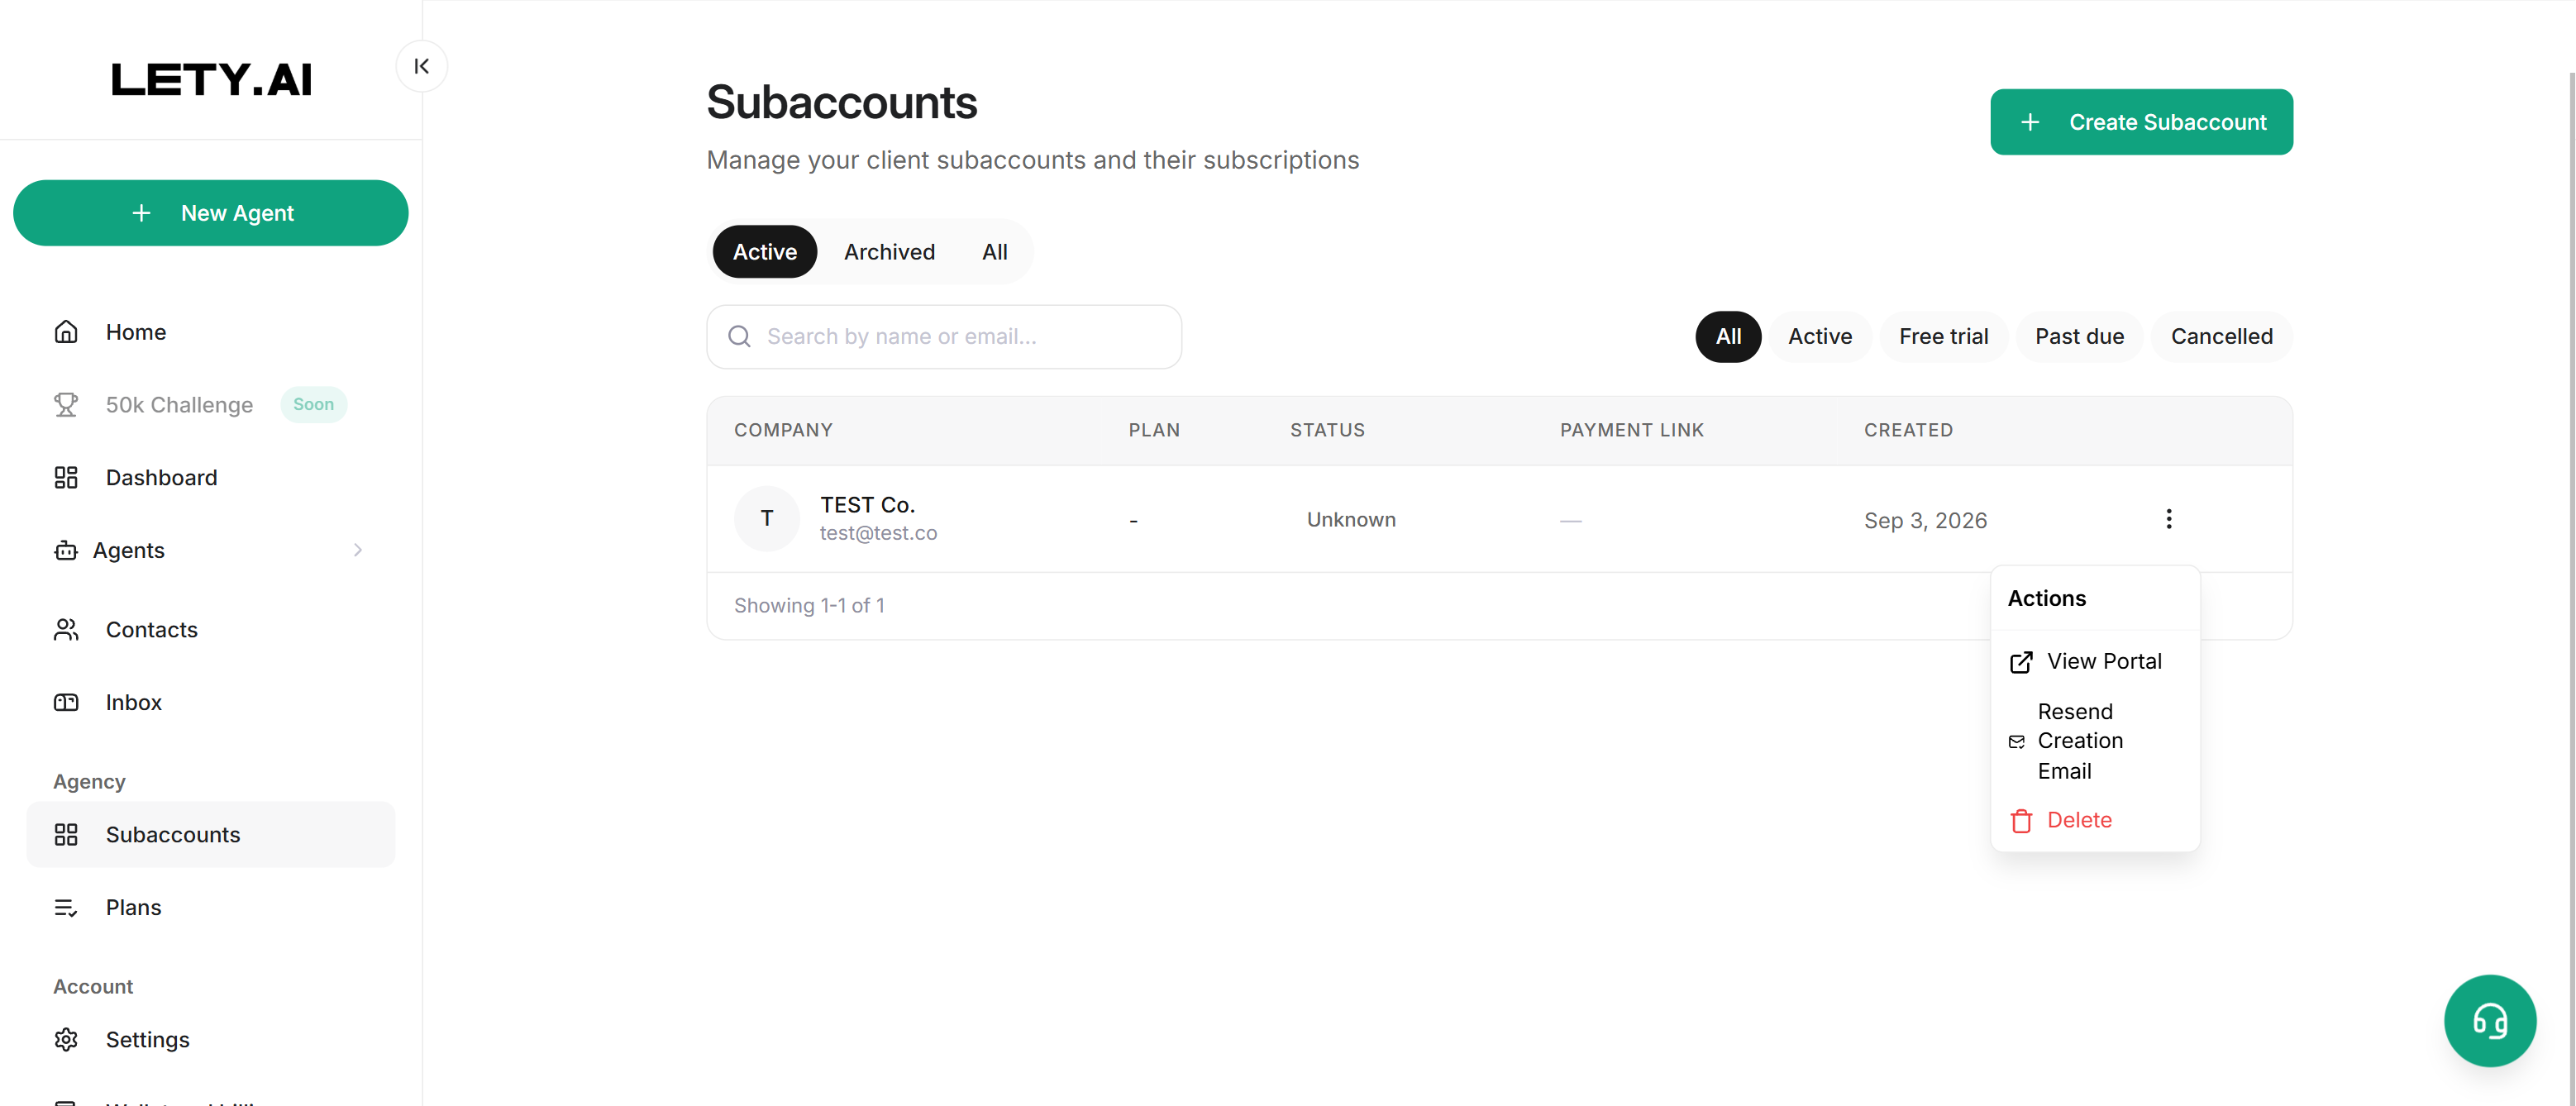
View Portal — opens that client's portal in a new tab, so you see the platform exactly as your client does.
Resend Creation Email — sends the activation email again, in case the client didn't receive it or the link expired.
Delete — permanently removes the subaccount.
Important: deleting a subaccount erases all of that client's data and can't be undone.
Tips
If your client can't find the activation email, ask them to check their spam folder.
Use Resend Creation Email if you need to send the invitation again.
"Choose a plan later" lets you create a subaccount without assigning a plan yet — useful while you're still negotiating.
You can copy the Stripe payment link and send it to your client directly by WhatsApp, email, or any other channel.
After you create a subaccount, the button changes to Clear Form so you can quickly create another.
Common problems
My client paid but their subaccount still shows no plan
My client paid but their subaccount still shows no plan
Ask your client to sign out and sign in again. If the subaccount is still inactive, contact support with your client's email and the payment date: as the payment is registered, they'll activate it.
Need help? Contact support from your platform’s home view.
Was this helpful?
Still need help? Ask the team